
Before you start
Sign in with a Storable Edge account that can manage corporate API settings. You will activate the existing StorIQ integration, not create a separate staff login or send us your login password.
Step 1 / Go to Corporate Level
Sign in and switch to Corporate Level
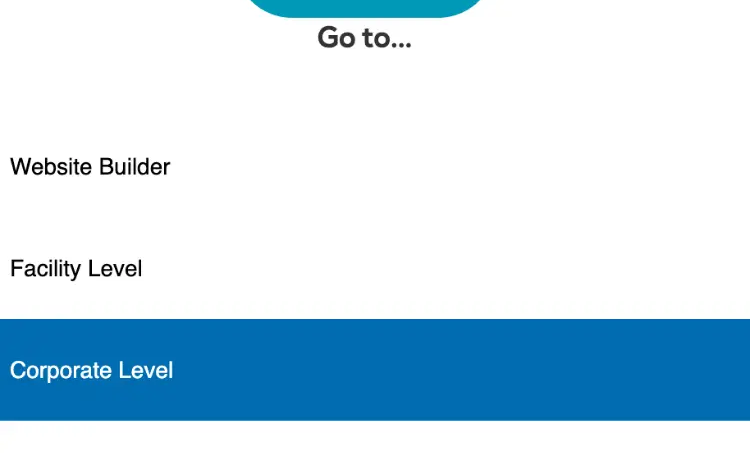
Log into Storable Edge. Open the main navigation menu and choose Corporate Level so you can manage the integration across your facilities.
Step 2 / Open Settings and API
Open your corporate API settings
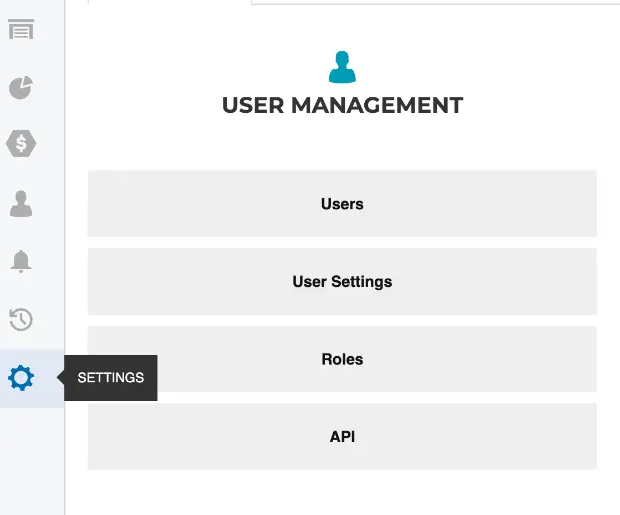
Click the Settings icon. In Corporate Settings, find User Management and click API.
Step 3 / Find StorIQ
Search for the StorIQ integration
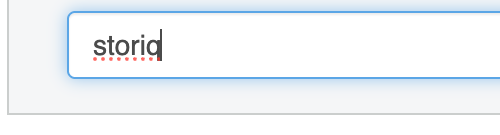
Enter StorIQ in the API search field and run the search. Open Online Marketing Service - StorIQ in the results.

Step 4 / Activate the API
Activate the StorIQ integration
Turn the integration On if it is not already active. In its settings, make sure the Active checkbox is selected.
Step 5 / Enable Read and reporting
Select all Read and reporting permissions
For StorIQ’s setup, enable every Read permission and all reporting permissions. Scroll through the full Assigned Permissions list so you do not miss options below the first screen.
Reporting permissions shown here include Create api/reports, Manage api/report requests and Create api/corporate/company reports. Check these as well as the Read permissions.
Do not select every permission indiscriminately. Leave unrelated Create, Update and Manage permissions unchecked unless your StorIQ contact specifically requests them.
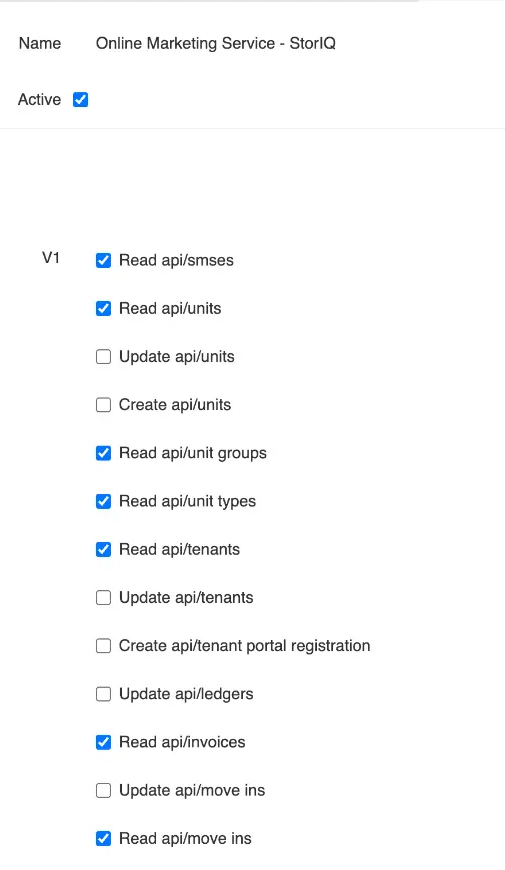

All Read permissions plus all reporting permissions, not every API permission.
Step 6 / Choose facilities and save
Choose the facilities StorIQ can access
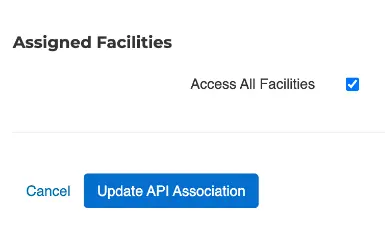
Under Assigned Facilities, choose Access All Facilities if every facility should be connected. If you only want specific facilities connected, leave that option off and select the participating facilities instead.
Check that the selection matches the locations you want StorIQ to work with, then click Update API Association.
Step 7 / Check that it saved
Reopen the integration and verify your settings
After submitting, go back to the API list and reopen the StorIQ integration. Do not assume the settings saved just because you clicked the update button.
Confirm that Active is still checked, all Read and reporting permissions remain selected, and the correct facilities are still assigned.
Sometimes the first submission does not retain the selections. If anything is missing, select it again, click Update API Association again, then reopen the integration and check once more.
Once the settings stay saved, let your StorIQ contact know access is ready and which facilities you included. We will check the connection. You do not need to send us your Storable Edge login password.
Reopen and check after saving. Repeat the update if the selections did not stick.
Common setup issues
The permissions or facilities disappear after saving
Reopen the StorIQ integration, reselect the missing permissions or facilities and click Update API Association again. Reopen it once more to confirm the settings remain selected. If they still do not save, send your StorIQ contact the exact message you see and a screenshot with tenant and account details removed.
I cannot find API settings or change the integration
Make sure you are at Corporate Level, not Facility Level. If you still cannot see Settings → API or edit the integration, ask the person who administers your Storable Edge account to complete these steps.
StorIQ cannot access one of our facilities
Reopen Assigned Facilities and make sure the affected location is included. Check that Active, Read permissions and reporting permissions are still selected, save any changes and reopen to verify. Tell your StorIQ contact which facility is affected.
When asking for help, include the facility name and what happened after you saved. Remove tenant information, passwords and account identifiers from screenshots.